Tuesday, April 13, 2010

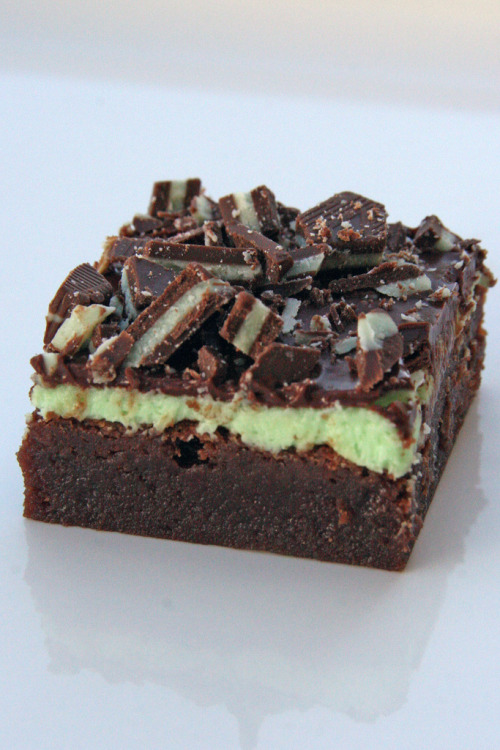
chocolate mint brownies

celebratewithcake:

Chocolate Mint Brownies:
Ingredients:

Brownie Layer:


1/2 cup (113 grams) unsalted butter, cut into pieces


4 ounces (114 grams) unsweetened chocolate, coarsely chopped


1 1/4 cups (250 grams) granulated white sugar


1 teaspoon pure vanilla extract


2 large eggs


1/2 cup (70 grams) all purpose flour


1/4 teaspoon salt


Mint Layer:


2 tablespoons (28 grams) unsalted butter, at room temperature


1 cup (115 grams) confectioners (powdered or icing) sugar, sifted


1 - 1 1/2 tablespoons heavy cream


1/2 teaspoon pure peppermint extract or 1-2 tablespoons creme de menthe


green food coloring (optional)


Chocolate Glaze:


3 ounces (90 grams) semisweet chocolate, chopped


1 tablespoon (14 grams) unsalted butter


Preparations:
Preheat oven to 325 degrees F (160 degrees C) and place the rack in the center of the oven. Have ready a 9 x 9 inch (23 x 23 cm) square baking pan that has been lined with aluminum foil across the bottom and up two opposite sides of the pan. Set aside.
Brownies: In a stainless steel (heatproof) bowl placed over a saucepan of simmering water, melt the butter and chocolate. Remove from heat and stir in the sugar and vanilla extract. Add the eggs, one at a time, beating well (with a wooden spoon) after each addition. Stir in the flour and salt and beat, with a wooden spoon, until the batter is smooth and glossy and comes away from the sides of the pan (about one minute). Pour the brownie batter evenly into the prepared pan.
Bake in the preheated oven for about 25 minutes or until the brownies start to pull away from the sides of the pan and the edges of the brownies are just beginning to brown. A toothpick inserted in the center of the brownies will come out almost clean. Remove from oven and place on a wire rack to completely cool.
Mint Layer: In the bowl of your electric mixer, or with a hand mixer, beat all the ingredients until smooth. Add a few drops of green food coloring if you want the frosting green. If the frosting is too thick, add a little extra cream. (The frosting should be just thin enough to spread.) Spread the frosting evenly over the cooled brownie layer. Place in the refrigerator for about 5-10 minutes or until firm.
Chocolate Glaze:  In a heatproof bowl over a saucepan of simmering water, melt the chocolate and butter. Spread over the mint filling and refrigerate for about 30 minutes or until the chocolate glaze starts to dull.
To Serve: Remove the brownies from the pan by lifting with the ends of the foil and transfer to a cutting board. With a sharp knife, cut into 30 squares. It is a good idea to wipe your knife between cuts with a damp cloth. These brownies can be stored in the refrigerator for several days or else frozen.
Makes about 30 1-inch (2.5 cm) squares.
Photo by Glorious Treats, recipe found at Chocolate Chipped by Stephanie Jaworski from Joy Of Baking.
celebratewithcake:
Chocolate Mint Brownies:
Ingredients:
Brownie Layer:
  • 1/2 cup (113 grams) unsalted butter, cut into pieces
  • 4 ounces (114 grams) unsweetened chocolate, coarsely chopped
  • 1 1/4 cups (250 grams) granulated white sugar
  • 1 teaspoon pure vanilla extract
  • 2 large eggs
  • 1/2 cup (70 grams) all purpose flour
  • 1/4 teaspoon salt
Mint Layer:
  • 2 tablespoons (28 grams) unsalted butter, at room temperature
  • 1 cup (115 grams) confectioners (powdered or icing) sugar, sifted
  • 1 - 1 1/2 tablespoons heavy cream
  • 1/2 teaspoon pure peppermint extract or 1-2 tablespoons creme de menthe
  • green food coloring (optional)
Chocolate Glaze:
  • 3 ounces (90 grams) semisweet chocolate, chopped
  • 1 tablespoon (14 grams) unsalted butter
Preparations:
Preheat oven to 325 degrees F (160 degrees C) and place the rack in the center of the oven. Have ready a 9 x 9 inch (23 x 23 cm) square baking pan that has been lined with aluminum foil across the bottom and up two opposite sides of the pan. Set aside.
Brownies: In a stainless steel (heatproof) bowl placed over a saucepan of simmering water, melt the butter and chocolate. Remove from heat and stir in the sugar and vanilla extract. Add the eggs, one at a time, beating well (with a wooden spoon) after each addition. Stir in the flour and salt and beat, with a wooden spoon, until the batter is smooth and glossy and comes away from the sides of the pan (about one minute). Pour the brownie batter evenly into the prepared pan.
Bake in the preheated oven for about 25 minutes or until the brownies start to pull away from the sides of the pan and the edges of the brownies are just beginning to brown. A toothpick inserted in the center of the brownies will come out almost clean. Remove from oven and place on a wire rack to completely cool.
Mint Layer: In the bowl of your electric mixer, or with a hand mixer, beat all the ingredients until smooth. Add a few drops of green food coloring if you want the frosting green. If the frosting is too thick, add a little extra cream. (The frosting should be just thin enough to spread.) Spread the frosting evenly over the cooled brownie layer. Place in the refrigerator for about 5-10 minutes or until firm.
Chocolate Glaze:  In a heatproof bowl over a saucepan of simmering water, melt the chocolate and butter. Spread over the mint filling and refrigerate for about 30 minutes or until the chocolate glaze starts to dull.
To Serve: Remove the brownies from the pan by lifting with the ends of the foil and transfer to a cutting board. With a sharp knife, cut into 30 squares. It is a good idea to wipe your knife between cuts with a damp cloth. These brownies can be stored in the refrigerator for several days or else frozen.
Makes about 30 1-inch (2.5 cm) squares.
Photo by Glorious Treats, recipe found at Chocolate Chipped by Stephanie Jaworski from Joy Of Baking.

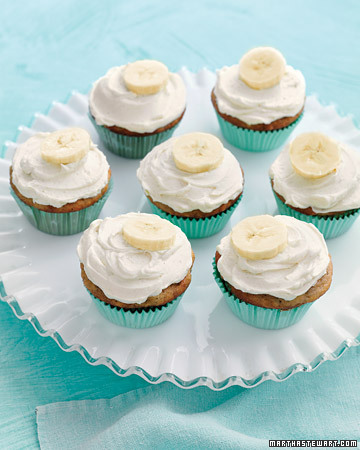
banana cupcakes with honey-cinnamon frosting

celebratewithcake:

sweettoothgirl:

Banana Cupcakes with Honey-Cinnamon Frosting
For a handheld treat that takes the cake, try these cute confections - they combine the flavor of classic banana bread with a creamy spiced frosting.
Prep: 10 minutes
Total: 40 minutes plus cooling
Ingredients: makes 12

1 1/2 cups all-purpose flour (spooned and leveled)
3/4 cup sugar
1 teaspoon baking powder
1/2 teaspoon baking soda
1/4 teaspoon salt
1/2 cup (1 stick) unsalted butter, melted
1 1/2 cups mashed bananas (about 4 ripe bananas), plus 1 whole banana for garnish (optional)
2 large eggs
1/2 teaspoon pure vanilla extract
Honey-Cinnamon Frosting

Directions:

Preheat oven to 350 degrees. Line a standered 12-cup muffin pan with paper liners. In a medium bowl, whisk together flour, sugar, baking powder, baking soda, and salt.
Make a well in center of flour mixture. In well, mix together butter, mashed bananas, eggs, and vanilla. Stir to incorporate flour mixture (do not overmix). Dividing evenly, spoon batter into muffin cups.
Bake until a toothpick inserted in center of a cupcake comes out clean, 25 to 30 minutes. Remove cupcakes from pan; cool completely on a wire rack. Spread tops with Honey-Cinnamon Frosting. Just before serving, peel and slice banana into rounds, and place one on each cupcake, if dersired. 


Website | Recommend | Submit | Ask

linda-we can do these if you dont want to do muffins!
celebratewithcake:
sweettoothgirl:
Banana Cupcakes with Honey-Cinnamon Frosting
For a handheld treat that takes the cake, try these cute confections - they combine the flavor of classic banana bread with a creamy spiced frosting.
Prep: 10 minutes
Total: 40 minutes plus cooling
Ingredients: makes 12
  • 1 1/2 cups all-purpose flour (spooned and leveled)
  • 3/4 cup sugar
  • 1 teaspoon baking powder
  • 1/2 teaspoon baking soda
  • 1/4 teaspoon salt
  • 1/2 cup (1 stick) unsalted butter, melted
  • 1 1/2 cups mashed bananas (about 4 ripe bananas), plus 1 whole banana for garnish (optional)
  • 2 large eggs
  • 1/2 teaspoon pure vanilla extract
  • Honey-Cinnamon Frosting
Directions:
  1. Preheat oven to 350 degrees. Line a standered 12-cup muffin pan with paper liners. In a medium bowl, whisk together flour, sugar, baking powder, baking soda, and salt.
  2. Make a well in center of flour mixture. In well, mix together butter, mashed bananas, eggs, and vanilla. Stir to incorporate flour mixture (do not overmix). Dividing evenly, spoon batter into muffin cups.
  3. Bake until a toothpick inserted in center of a cupcake comes out clean, 25 to 30 minutes. Remove cupcakes from pan; cool completely on a wire rack. Spread tops with Honey-Cinnamon Frosting. Just before serving, peel and slice banana into rounds, and place one on each cupcake, if dersired.

mini key lime cupcakes

celebratewithcake:

sweettoothgirl:

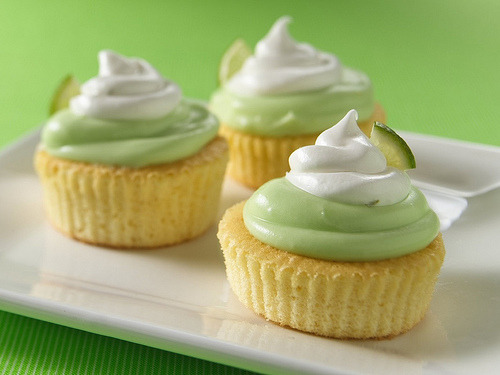
Mini Key Lime Cupcakes
Ingredients:
Topping:

1 box (4-serving size) vanilla instant pudding and pie filling mix
1 1/2 cups whipping cream
1/4 cup Key lime or regular lime juice
4 drops green food color
1 1/2 cups powdered sugar

Cupcakes:

48 regular-size paper baking cups
1 box Betty Crocker Super Moist yellow cake mix
Water, vegetable oil and eggs called for on cake mix box

Frosting:

1 container Betty Crocker Whipped fluffy white frosting
1 tablespoon Key lime or regular lime juice
1/2 teaspoon grated Key lime or regular lime peel

Directions:

In a large bowl, beat pudding mix and whipping cream with wire whisk 2 minutes. Let stand 3 minutes. Beat in 1/4 cup Key lime juice and the food color; stir in powdered sugar until smooth. Cover and refrigerate.
Heat oven to 375 degreesF. (350 degreesF for dark or nonstick pans). Place paper baking cups in each of 24 regular-size muffin cups. Make cake batter as directed on box. Spoon about 1 rounded tablespoonful batter into each muffin cup, using about half of the batter. (Muffin cups will be about 1/3 full.) Refrigerate remaining batter. Bake 12 to 16 minutes or until toothpick inserted in center comes out clean. Remove from pan to cooling rack. Repeat with remaining baking cups and batter. Cool cupcakes completely, about 15 minutes.
Remove paper baking cups from cupcakes. Swirl about 2 teaspoons topping on top of each cupcake.
Stir frosting in containter 20 times. Gently stir in 1 tablespoon Key lime juice and the lime peel. Spoon frosting into 1-quart resealable food-storage plastic bag. Cut 1/2-inch opening from bottom corner of bag. Squeeze 1 rounded teaspoonful frosting from bag onto topping. Garnish with fresh lime wedge, if desired. Store in refrigerator.

High Altitude (3500-6500 ft): Divide batter in half. Distribute 1/2 batter evenly among 24 muffin cups. Refrigerate remaining batter, and repeat process.

Website | Recommend | Submit | Ask | Apparel
celebratewithcake:
sweettoothgirl:
Mini Key Lime Cupcakes
Ingredients:
Topping:
  • 1 box (4-serving size) vanilla instant pudding and pie filling mix
  • 1 1/2 cups whipping cream
  • 1/4 cup Key lime or regular lime juice
  • 4 drops green food color
  • 1 1/2 cups powdered sugar
Cupcakes:
  • 48 regular-size paper baking cups
  • 1 box Betty Crocker Super Moist yellow cake mix
  • Water, vegetable oil and eggs called for on cake mix box
Frosting:
  • 1 container Betty Crocker Whipped fluffy white frosting
  • 1 tablespoon Key lime or regular lime juice
  • 1/2 teaspoon grated Key lime or regular lime peel
Directions:
  1. In a large bowl, beat pudding mix and whipping cream with wire whisk 2 minutes. Let stand 3 minutes. Beat in 1/4 cup Key lime juice and the food color; stir in powdered sugar until smooth. Cover and refrigerate.
  2. Heat oven to 375 degreesF. (350 degreesF for dark or nonstick pans). Place paper baking cups in each of 24 regular-size muffin cups. Make cake batter as directed on box. Spoon about 1 rounded tablespoonful batter into each muffin cup, using about half of the batter. (Muffin cups will be about 1/3 full.) Refrigerate remaining batter. Bake 12 to 16 minutes or until toothpick inserted in center comes out clean. Remove from pan to cooling rack. Repeat with remaining baking cups and batter. Cool cupcakes completely, about 15 minutes.
  3. Remove paper baking cups from cupcakes. Swirl about 2 teaspoons topping on top of each cupcake.
  4. Stir frosting in containter 20 times. Gently stir in 1 tablespoon Key lime juice and the lime peel. Spoon frosting into 1-quart resealable food-storage plastic bag. Cut 1/2-inch opening from bottom corner of bag. Squeeze 1 rounded teaspoonful frosting from bag onto topping. Garnish with fresh lime wedge, if desired. Store in refrigerator.
High Altitude (3500-6500 ft): Divide batter in half. Distribute 1/2 batter evenly among 24 muffin cups. Refrigerate remaining batter, and repeat process.

asparagus pesto

 from here

It has come to my attention that many of you do not visit Local Lemons in search of an easy weeknight meal. Is it because I make things like this 5-hour lamb bolognese? Or maybe because my homemade chicken nuggets take over 2 hours? Okay. You have a point.
Today, I’m making a change. I’m going to show you how to make authentic pesto from scratch and have dinner on the table in 30 minutes. Come on, if Rachael Ray can do it, why can’t I? (Geez, never thought the day would come when I mention Rachael Ray). Anyway. By authentic, I mean in technique. Obvious there is no basil in this pesto. And for a good reason – it’s March! If you’re making basil pesto right now, you better live in the tropics (or LA, or Miami). This pesto is authentic because it uses local ingredients that are all in season. Plus, it’s made with a mortar and pestle. This is the most important kitchen tool for making pesto. If you are using a food processor, you’re truly missing out. The food processor pulverizes and jumbles all the flavors, leaving you unable to distinguish the unique qualities of each ingredient. Don’t believe me? Do a side-by-side comparison. I guarantee you’ll never make pesto in a machine again (and you’ll probably never order it at a restaurant again either.)

I mashed together fresh spring asparagus, garlic, walnuts, chili peppers and sharp cheese into a thick, pungent paste softened by a light stream of high-quality olive oil. When the pasta was ready, I tossed in some spinach leaves, an egg and a heaping spoonful of the bright green pesto.
Wait, did I lose you at the egg? I love adding an egg or two to pasta dishes when I want a touch of creaminess without adding cream. I never add cream to pasta. Never. Bechamel, yes. Cream, no. All it does is dilute the vim of the rich sauce you lovingly prepared, while adding tasteless fat and heaviness. Eggs, on the other hand, enhance the flavors in your sauce. Especially if the eggs are farm-fresh, and the sauce is a pesto. The trick is to not let the eggs scramble. Crack an egg into a small bowl, add a teaspoon of the hot cooking liquid from the pasta, and lightly beat. After you drain the pasta, put it back into the pot and quickly stir in the eggs. Don’t hesitate or you’ll have chunks of egg instead of a light coating surrounding each noodle. Now add the pesto. And now enjoy a seasonal, from-scratch meal that took a total of 30 minutes. Take that Rachael Ray (Gr, there I go again!).

A note about cheese, because I just found my new favorite. It’s incredible. Sharp, nutty, crumbly, intense–and it’s local. Erin and I have been recipe-testing for Little Mac, and received a nice sampling of cheeses from Vella Cheese company. Their Oro Secco, a dry jack cheese that’s aged for 2 years, is amazing. I hate using such a generic word for such a special cheese, but amazing it is. The only problem is that it’s pricey, too much so for our mac and cheese. But perfect for this asparagus pesto. If you can’t find it, use regular dry jack in its place.

Asparagus Pesto with Pasta
4 servings / Cooking time: 30 minutes

Ingredients:
About 10 stalks of asparagus, woody ends removed
2 -3 garlic cloves, peeled and crushed
Handful of walnuts
1 egg
2 dried chili peppers (optional)
Handful of spinach, washed and torn into large pieces
Top-notch olive oil (I use California Olive Ranch Arbaquina. It’s affordable, bold and so tasty.)
1/2 cup Oro Secco cheese, finely grated (Or dry jack, or a hard, sharp cheese of your choice)
Sea salt
Freshly ground pepper
1 pound pasta (I used elbows, only because I had a ton on hand from mac and cheese testing. Linguine would work quite well.)

Set a large pot of water to boil and add asparagus. Cook for two minutes and lift asparagus out of the pot using tongs. Run under cold water to stop cooking, and chop into small pieces. Keep the water boiling for your pasta.
Using a mortar and pestle, mash the garlic with a sprinkle of salt until it forms a paste. Add the walnuts and dried chili peppers and continue mashing. Next add the asparagus, and mash until they fall apart. Add the cheese and stop mashing. Add a thin stream of olive oil and stir until it forms a thick paste (about 1/3 – 1/2 of a cup). Taste for salt. Add freshly ground black pepper if needed.

Cook pasta in boiling water. When done, drain, reserving a 1/2 cup of cooking liquid. Return pasta to pot, and keep on a burner set to the lowest heat. Add half of the reserved water.
Crack the egg into a small bowl. Gently beat. Add 1 teaspoon of the hot cooking liquid and stir. Add the egg to the pasta, and stir quickly so the egg doesn’t set. Don’t let it scramble!
Add the spinach and stir until wilted. Finally, add the pesto and mix until fully combined. If pesto is too thick, add remaining pasta water.
Serve with grated cheese and top with a drizzle of olive oil.

lemon cheesecake

celebratewithcake:

sweettoothgirl:

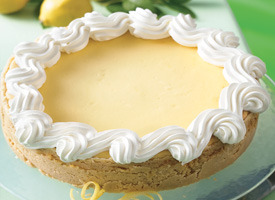
Lemon Cheesecake
Cake mix is the secret to an easy press-in-the-pan crust and a foolproof cream cheese filling.
Prep Time: 15 min / Total Time: 6 hours 50 min / Makes: 16 servings
Ingredients:
Crust:

1 box Betty Crocker SuperMoist yellow cake mix
1/2 cup butter or margarine, softened
1 teaspoon grated lemon peel

Filling:

2 packages (8 oz each) cream cheese, softened
3/4 cup sugar
3 containers (3.5 oz each) lemon pudding (from 4-pack container)
1/2 cup sour cream
3 eggs
2 cups frozen (thawed) whipped topping

Directions:

Heat oven to 300 degreesF. Spray bottom and side of 10-inch springform pan with baking spray with flour. Wrap foil around the outside of pan to catch drips. Reserve 1/4 cup of the cake mix; set aside. In large bowl, beat remaining cake mix, butter and lemon peel with electric mixer on low speed until crumbly. Press in bottom and 1 1/2 inches up side of pan.
In same large bowl, beat reserved cake mix, the cream cheese, sugar, pudding and sour cream on medium speed until smooth and creamy. Beat in eggs, on at a time, until mixed. Pour over crust.
Bake 1 hour 20 minutes to 1 hour 35 minutes or until edges are set but center of cheesecake jiggles slightly when moved. Turn oven off; open oven door at least 4 inches. Leave cheesecake in oven 30 minutes longer.
Remove cheesecake from oven; place on cooling rack. Without relesing side of pan, run knife around edge of pan to loosen cheesecake. Cool in pan on cooling rack 30 minutes. Cover loosely; refrigerate 4 hours or overnight. Remove side of pan before serving. Pipe pr spoon whipped topping around outside edge of cheesecake. Store in refrigerator.

High Altitude (3500-6500 ft): Heat oven to 325 degreesF.
Subtitution: If you don’t have fresh lemon to grate peel for the crust, just omit it. There is still plenty of lemon flavor in the cheesecake.
How-To: For clean cuts when serving the cheesecake, dip a sharp knife in hot water and dry on a paper towl before each cut.
Nutrition Information:
1 Serving: Calories 400 (Calories from Fat 210); Total Fat 23g (Saturated Fat 14g, Trans Fat 1 1/2g);Cholesterol 90mg; Sodium 380mg; Total Carbohydrate 43g (Dietary Fiber 0g, Sugars 30g); Protein5g Percent Daily Value*: Vitamin A 15%; Vitamin C 0%; Calcium 10%; Iron 6% Exchanges: 1/2 Starch; 2 1/2 Other Carbohydrate; 0 Vegetable; 1/2 High-Fat Meat; 3 1/2 Fat Carbohydrate Choices: 3 *Percent Daily Values are based on a 2,000 calorie diet.

Website | Recommend | Submit | Ask | Apparel
celebratewithcake:
sweettoothgirl:
Lemon Cheesecake
Cake mix is the secret to an easy press-in-the-pan crust and a foolproof cream cheese filling.
Prep Time: 15 min / Total Time: 6 hours 50 min / Makes: 16 servings
Ingredients:
Crust:
  • 1 box Betty Crocker SuperMoist yellow cake mix
  • 1/2 cup butter or margarine, softened
  • 1 teaspoon grated lemon peel
Filling:
  • 2 packages (8 oz each) cream cheese, softened
  • 3/4 cup sugar
  • 3 containers (3.5 oz each) lemon pudding (from 4-pack container)
  • 1/2 cup sour cream
  • 3 eggs
  • 2 cups frozen (thawed) whipped topping
Directions:
  1. Heat oven to 300 degreesF. Spray bottom and side of 10-inch springform pan with baking spray with flour. Wrap foil around the outside of pan to catch drips. Reserve 1/4 cup of the cake mix; set aside. In large bowl, beat remaining cake mix, butter and lemon peel with electric mixer on low speed until crumbly. Press in bottom and 1 1/2 inches up side of pan.
  2. In same large bowl, beat reserved cake mix, the cream cheese, sugar, pudding and sour cream on medium speed until smooth and creamy. Beat in eggs, on at a time, until mixed. Pour over crust.
  3. Bake 1 hour 20 minutes to 1 hour 35 minutes or until edges are set but center of cheesecake jiggles slightly when moved. Turn oven off; open oven door at least 4 inches. Leave cheesecake in oven 30 minutes longer.
  4. Remove cheesecake from oven; place on cooling rack. Without relesing side of pan, run knife around edge of pan to loosen cheesecake. Cool in pan on cooling rack 30 minutes. Cover loosely; refrigerate 4 hours or overnight. Remove side of pan before serving. Pipe pr spoon whipped topping around outside edge of cheesecake. Store in refrigerator.
High Altitude (3500-6500 ft): Heat oven to 325 degreesF.
Subtitution: If you don’t have fresh lemon to grate peel for the crust, just omit it. There is still plenty of lemon flavor in the cheesecake.
How-To: For clean cuts when serving the cheesecake, dip a sharp knife in hot water and dry on a paper towl before each cut.
Nutrition Information:
1 Serving: Calories 400 (Calories from Fat 210); Total Fat 23g (Saturated Fat 14g, Trans Fat 1 1/2g);Cholesterol 90mg; Sodium 380mg; Total Carbohydrate 43g (Dietary Fiber 0g, Sugars 30g); Protein5Percent Daily Value*: Vitamin A 15%; Vitamin C 0%; Calcium 10%; Iron 6Exchanges: 1/2 Starch2 1/2 Other Carbohydrate0 Vegetable1/2 High-Fat Meat3 1/2 Fat Carbohydrate Choices: 3
*Percent Daily Values are based on a 2,000 calorie diet.

simple stir fry by kelsey nixon

Simple Stir-fry
...........................................
Yield: 1-2 servings

1-2 chicken breasts, sliced thin
2 teaspoons cornstarch
1 tablespoon peanut or sesame oil
1 teaspoon ginger, minced
1/4 cup red bell pepper, julienne
1/4 cup green bell pepper, julienne
1/2 cup snow peas, sliced thin
1/4 cup red onion, sliced thin
2 tablespoons Asian sweet chili sauce
2 tablespoons soy sauce
1 tablespoon rice vinegar
1/4 cup baby bok choy, sliced crosswise into 1/2 inch slices
1/4 cup mandarin oranges, peeled & segmented
1/4 cup green onions, thinly slice on a diagnol

Place chicken strips in a medium size bowl. Sprinkle with salt and freshly ground black pepper and toss with cornstarch to coat. Heat oil in large non-stick skillet or wok over medium-high heat. Add minced ginger, stir 30 seconds. Add chicken; stir fry until chicken is beginning to brown an is almost cooked through, 2-3 minutes. Add bell peppers, snow peas and onion; toss for 1 minute. Add sweet chili sauce, soy sauce and rice vinegar; boil until sauce thickens slightly, tossing to blend, about 1 minute. Stir in bok choy, mandarin oranges, and scallions. Stir-fry just until bok choy is just wilted. Season to taste with salt and pepper. Transfer to serving dish and top with remaining green onions.

sugar cookies by kelsey nixon

Super Soft Sugar Cookies
...............................................
Yield: 2 dozen

1 cup butter, softened
2 cups + 2 tablespoons powdered sugar
2 eggs
8 ounces sour cream
1 teaspoon vanilla
1/2 teaspoon salt
1/2 teaspoon baking soda
4 teaspoons baking powder
approximately 4 1/2 cups flour

Preheat oven to 350 degrees F. Cream together butter and sugar. Add remaining wet ingredients; eggs, sour cream & vanilla. In a separate medium bowl combine salt, baking soda & baking powder. Slowly mix into wet ingredients until combined. Finally, add flour slowly, adding more or less if needed.
Let the dough chill for at least an hour, although longer is preferable. (I suggest sticking it in the freezer for 5 minutes before rolling out) Roll out dough on a well floured surfaced and cut into shapes. Bake for 8-10 minutes, depending on size.
Keys to the cookies: Roll the dough at least 1/4 inch thick and don't overbake.